Creating the Project
We’re going to start out by simply making an empty project - a place where we can add our content and files. Now you have an empty project folder (containing your README.md file) we can fire up Brackets and start work.
Create the Empty Project
Let’s go through these steps to make the start of our project;
- Launch Brackets
- Open the folder you created earlier in the ‘Git’ step.
- For now, just create two completely empty files. You can do this by right clicking on the “Project” panel on the left hand side and selecting “New File”.
- index.html
- style.css
- We might as well also add these three empty folders now too, as we will need them later. Again, right click on the “Project” panel on the left but this time select “New Folder”.
- assets
- libs
- source
Here’s a quick overview of what you’ve created;
index.html: This is the actual webpage that will deliver our game. It might just end up being a simple black page with our game in the middle or it could be a fancy piece of art that makes our game stand out.
style.css: We’ll come onto CSS a bit later, but this file will describe that the contents of index.html should look like by applying some styling to the page.
assets/: This folder is where we’re going to store all of the images and audio files that make up our game. In a really big game you might end up with hundreds of images and sound effect files here, as well as a bunch of music tracks.
libs/: It’s typical that games and other large projects will make use of code created by other people. Writing everything that’s included in Phaser took a team of people many years of work. We’ll drop our 3rd party libraries in here later.
source/: This is where most of our JavaScript will go for our game!
Your First Git Commit!
Now is a good time to make our first Git commit. Let’s commit what we have done so we have a snapshot of our empty project.
Follow these steps to make your first commit to your local Git repository. Remember, these changes are only being stored on your local computer for now, but if you decide to upload your work to GitHub later, all of this history will be preserved forever.
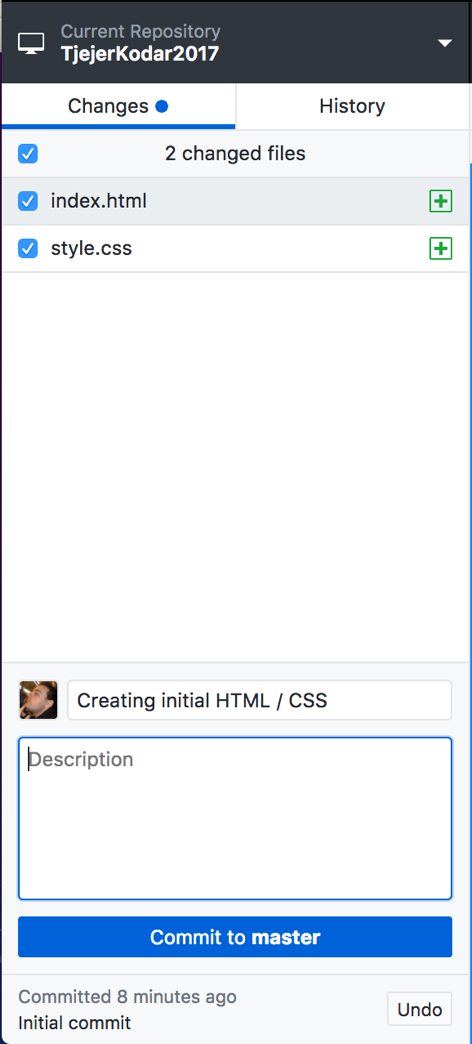
- Open GitHub Desktop
- Ensure the right repository is open at the top left (“TjejerKodar”).
- You should see the two new files you’ve added in “Changed Files” list.
- Type in a summary for what you’ve done. This is a very short message to remind you what you have done.
- Click “Commit to master”
- Click “History” and see your commit in the history.