Phaser States
States (Scenes)
Phaser on it’s own doesn’t really do anything. It contains a large amount of code for building a game, but it doesn’t contain any game logic itself. One core concept for Phaser is the idea of ‘states’. A ‘state’ is almost like a separate page on a website, or a different view in a mobile application. Your application can contain any number of different states (Title Screen, Options Screen, Main Game Screen) and switch between them easily.
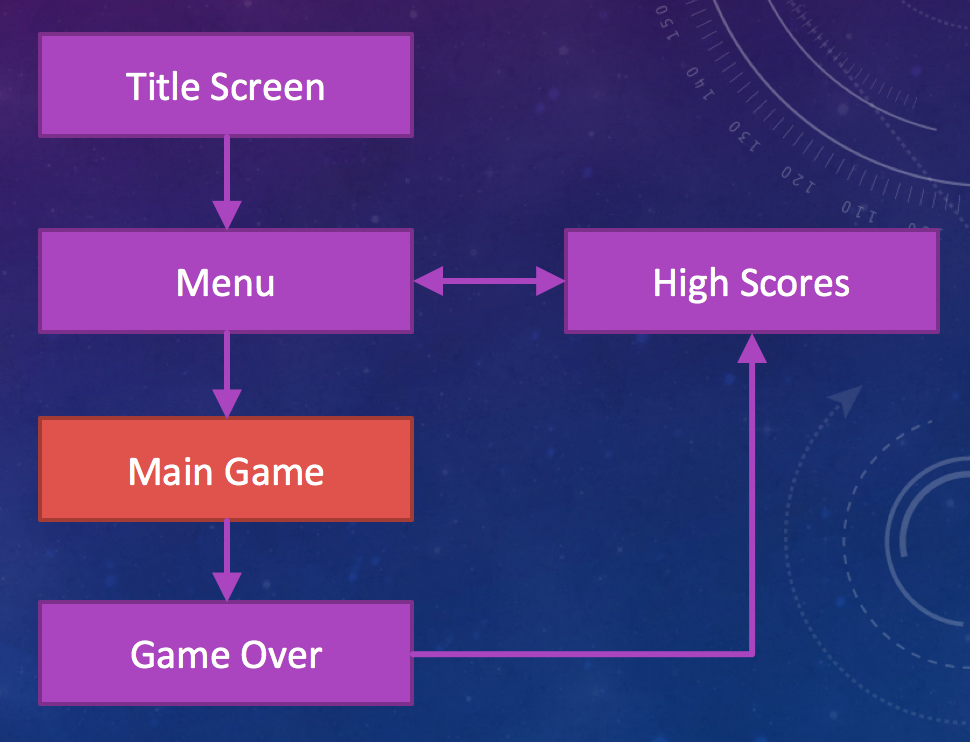
For our purposes, we only need one state for now - the game itself. You might later find yourself adding additional states (a Game Over screen for instance), but for now - we just want to get on with making the game prototype! As such, we will just have one ‘state’ or ‘scene’ and that will be the gameplay itself.
Creating the Main Game Scene
For now, we will simply add an empty state or scene to our project. Unfortunately, at the end of this task we’ll still only be drawing a black box on the screen - but then we’ll just be one step away from adding a space background to our game world!
1. Create source/maingame.js in Brackets
It’s a good idea to store the code for each different state in separate JavaScript files (.js). This helps to keep your project tidy and this file will form the main part of your game!
In Brackets, go ahead and make a JavaScript file called source/maingamestate.js in your project.
At this point, the source code for your game consists of two parts - one line of code in the index.html file contained in <source> tags and this file. All of your code will go into one of these two places for the majority of the core project.
2. Create our ‘mainGameState’ Object
As described previously, Phaser can load and play various ‘states’ while running your game. For now, we will just create a single state - the “Main Game State”. This is the state we will use to do all of the logic for our game. Later on, you might choose to add a Title Screen as a bonus quest - that would be another state.
A Phaser state is a regular JavaScript object but with specific functions inside of it that Phaser will call while the game is running. Let’s create that object now. Type the following code into your maingamestate.js file to setup the mainGameState object.
// Create an empty object
var mainGameState = { }
// Add the preload function
mainGameState.preload = function() {
console.log("Pre-loading the Game");
}
// Add the create function
mainGameState.create = function() {
}
// Add the update function
mainGameState.update = function() {
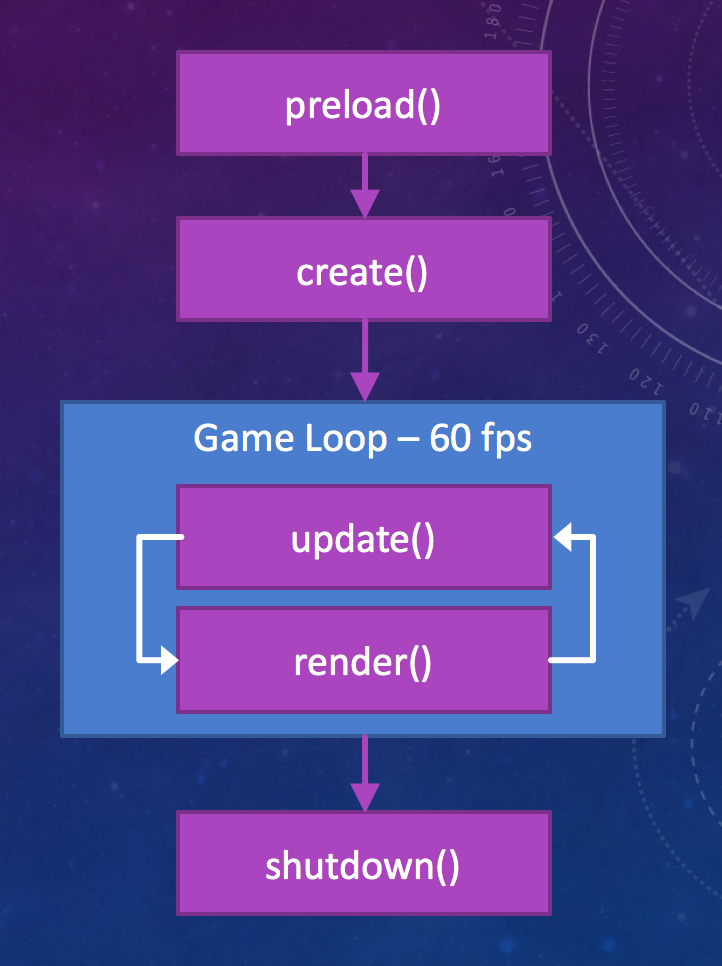
}So, this code generates a JavaScript object with the 3 functions required by Phaser to use that object as a ‘State’. All states should have these three functions as a base and this is why Phaser needs them;
preload: Phaser will call ‘preload’ when creating your scene (while your game is starting up). This is where you should load up all of the images and audio you need to use in your game.
create: Phaser will call ‘create’ after calling preload, but still while creating your scene. This is where you can place objects in the scene or setup a user interface before the scene is shown to the player.
update: Phaser calls ‘update’ every time your screen refreshes - that could be up to 60 times every second! This is basically where nearly all of your game logic will live. Here you will check whether the player is pressing a button on the keyboard and respond by firing bullets or moving the spaceship.
3. Load the Main Game State
This last step is where we tell Phaser about the state object we have created so that it can run the game described in our “Main Game State”. Now, our game state won’t do anything at the moment - but it should print out “Pre-loading the Game” into the Chrome Developer Console when it loads up our state.
In order to register our game state with Phaser, we need to go back to the code where we created the Phaser game in the first place - in index.html. Here, you need to call game.state.add(stateName, stateObject); to first register our state with Phaser. This tells Phaser that our object exists. If we had multiple game states at this time, this is where you would register them all.
Second, we need to tell Phaser we want to start the game off with the main game state by using game.state.start(stateName);.
In your index.html file where you create the phaser game, you should add these lines of code.
    game.state.add("MainGame", mainGameState);
    game.state.start("MainGame");
These two lines of code register the object you have created in libs/maingamestate.js as a ‘state’ that Phaser is able to use. The next line of code tells Phaser to start that state!
We’re still only looking at a black box on the screen so there’s not much to see yet I’m afraid. However, if you open the Chrome Developer Console you will should see a message that says “Pre-loading the Game” in your console. This proves that your “preload” method is being called in your state!